

Camp Caps Factory: How Custom Five-Panel Hats Are Designed and Made
2026-09-07
Walk through a camp caps factory and the first thing you notice is how much a five-panel hat can change before it reaches your head. At 4ugear, custom camp caps aren't pulled from a generic template—they're designed, cut, and stitched with decisions that affect crown height, seam curve, and brim shape. Here's a closer look at how those hats go from blank fabric to finished cap.
Sketch to First Sample Without Losing the Idea
Turning a sketch into a first sample is where good ideas quietly fall apart. The drawing captures a mood, a proportion, a line weight that feels obvious on paper but gets smoothed over when translated into fabric, plastic, or metal. To hold onto it, mark the sketch with the elements you cannot compromise on—maybe it is the angle of a collar, the radius of a corner, or the way a seam interrupts a print. Those notes are not extras; they are the bridge between the page and the pattern maker or machinist.
The sampling stage rewards people who stay close to the drawing. Instead of handing off the sketch and waiting, sit with the first sample and put it next to the original. Look for where the energy dropped: a hem that hangs too stiff, a surface texture that reads flat, a handle that feels heavier than it looked. Small changes in material thickness, stitch tension, or drafting tolerance often cause the drift. Fix them early, while the idea is still the reference point, not the sample.
A first sample does not need to be perfect; it needs to prove the sketch can survive contact with real materials. Keep one copy of the original drawing pinned above your workspace. Every revision gets judged against that instead of against the previous sample. This stops the slow creep toward "good enough" and keeps the final sample recognizably yours.
Fabric and Hardware Choices That Shift the Feel
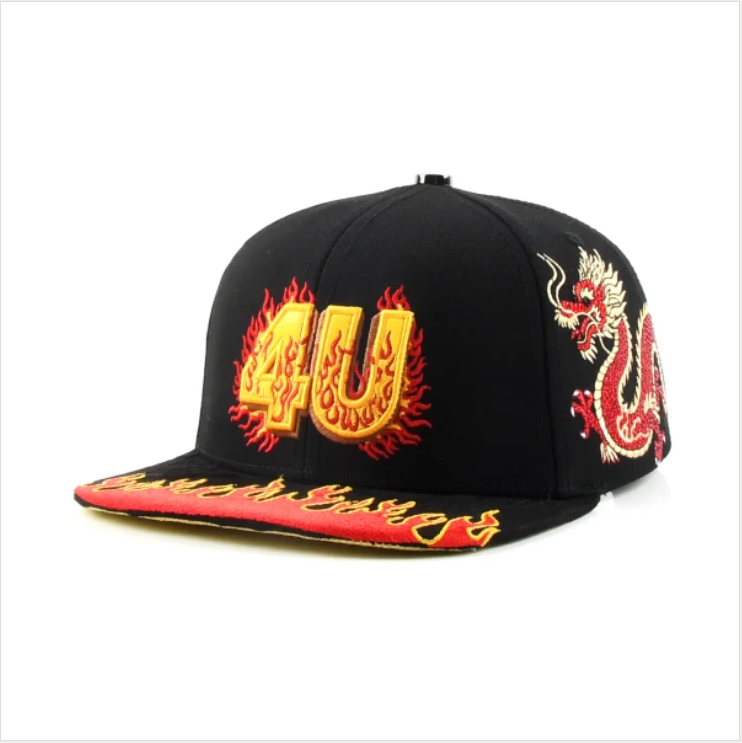
Swap out brushed nickel for unlacquered brass and a quiet piece suddenly carries a warmer, more settled presence. The same silhouette in a nubby boucle versus a waxed canvas reads entirely different—one invites a hand to linger, the other asks to be tossed in the back of a car.
It’s not just looks. A chunky zipper with a leather pull changes the sound and weight of an opening. A hidden magnetic closure keeps the front clean. Even the stitch density around a pocket can make something feel either disposable or built to outlast trends.
Those small decisions add up before you consciously notice them. The way a strap falls, how a buckle cools against your fingers, whether the lining rustles or stays silent—these are the details that move a piece from standard to something you reach for without thinking.
Cutting and Joining Five Panels for a Clean Crown
Start by tracing your five crown panels onto fabric with the grain running consistently from top to bottom. A clean crown comes down to accurate seam allowances, so mark the stitching lines rather than relying on the cut edge. Cut each panel with a sharp rotary blade and transfer any notches at the center front and back; those little reference points keep the curve of the crown from twisting as you assemble.
Join the panels in two stages: sew the front three panels together first, then the back two, and finally connect those sections along the side seams. Press every seam flat before crossing it with another, and trim the seam allowance to about a quarter inch as you go. When the last seam is closed, turn the crown right side out and run a finger along each seam from the inside to push out the curve. The result should sit smooth at the peak and hold its shape without puckers.
Placing Embroidery, Labels, and Custom Marks
The placement of embroidery, labels, and custom marks is more than a step in production; it's a deliberate design conversation. Each element must sit where the eye naturally pauses, respecting the garment's seams and the body's movement. A logo on a sleeve cuff or a custom mark near the hem can anchor the piece, making it feel both intentional and unfussy.
Small shifts in position change how a garment reads. An embroidered name tucked inside a collar feels like a private signature, while a label stitched along the side seam adds a quiet structural detail. The goal is to avoid visual clutter—every mark should earn its place, working with the fabric's weave and the cut's geometry rather than against it.
For custom marks, consider how light and wear will interact over time. A heat-transferred vinyl mark might feel crisp on a flat panel but stretch awkwardly over a curved shoulder. Testing placement on a live model, not just a flat lay, reveals how the mark behaves when the body moves—ensuring the final piece looks as good in motion as it does on the hanger.
Final Seam Checks and Packing Before Shipping
Every garment gets turned inside out under bright lighting, so seam integrity is checked by hand and eye. We look for skipped stitches, uneven tension, puckering at corners, and loose ends that could unravel after a few washes. High-stress areas like shoulder seams, armholes, and crotch points get a gentle pull test to confirm they hold without popping. If a seam doesn't meet the standard, it goes straight back for rework rather than into the bin.
Once seams pass, the packing step is just as deliberate. Garments are folded with tissue to prevent creasing along seam lines, then sealed in poly bags that aren't too tight. Small silica packets are added only when humidity is a concern. Boxes are packed snug but not overstuffed, and each carton gets a checklist confirming the final seam audit was done before the tape goes on.
Small Custom Orders and How the Line Adjusts
Handling small custom orders means stepping away from the usual rhythm of long production runs. Instead of setting up a line once and letting it run for hours, the crew has to pause, swap out tooling or fixtures, and recalibrate for a batch that might only be a few dozen pieces. This frequent changeover used to eat up time, but we’ve learned to stage materials and pre-set adjustments so the line doesn’t sit idle. A quick walk-through of the next order before the current one finishes makes the switch feel less like a disruption and more like a natural pivot.
The line itself gets reconfigured in small ways: guide rails moved a few centimeters, a different sealing temperature dialed in, or a filler nozzle swapped for one with a narrower opening. Operators keep a laminated card at each station listing the most common custom tweaks, so nobody has to guess or wait for a supervisor. Because the changes are minor and well-documented, even a run of fifty customized units can flow through without triggering the kind of slowdown that used to accompany special requests.
What makes this work is treating small custom orders as part of the normal workload rather than an exception. The line is built with quick-release clamps and adjustable guides, so a setup that takes minutes instead of an hour. When a custom order finishes, the team resets to the standard configuration and logs any unusual adjustments, turning each small run into a reference for the next one. Over time, the line has become more flexible without sacrificing the steady pace of regular production.
FAQ
It usually starts with a rough sketch or a reference photo from the client. The factory team translates that into a digital pattern, adjusting the crown height, brim curve, and panel seams until the proportions feel right. At this stage, fabric swatches and thread colors are often pinned to the drawing so everyone can see how the final piece might come together.
Most factories prefer a stiffened cotton twill or a poly-cotton blend for the crown because it keeps the structured look without feeling heavy. The brim is typically reinforced with a thin plastic or fiberboard insert, then covered with the same fabric as the crown or a contrasting one. For outdoor-focused caps, a water-resistant nylon or ripstop can be swapped in.
The cleanest method is direct embroidery, where a digitized file guides the needle to build the logo with dense, even stitches. For smaller runs or complex gradients, a woven patch or a heat-transfer label can be sewn or pressed onto the center panel. A good factory will always test the stitch count and backing on scrap fabric before running the full batch.
You can feel it in the seams and the brim. A quality cap has taped interior seams, a sweatband that doesn't twist, and a brim that snaps back after being bent. The five panels should meet at the top without puckering, and the eyelets or vents should be cleanly punched, not frayed.
The five-panel shape leaves a larger unbroken front area, which gives logos and artwork more room to breathe. It also tends to have a shallower, more rounded crown, so it sits lower on the head. For streetwear and cafe merch, that relaxed profile often fits the vibe better than a structured six-panel.
They usually keep a physical swatch book for each client and log the exact Pantone or thread codes used in production. Before dyeing or cutting, a lab dip is sent for approval. If the client changes fabric suppliers, the factory recalibrates the dye formula so the next batch doesn't shift noticeably.
Yes, many factories now offer low minimums, sometimes starting around 50 to 100 pieces, especially if you stick to stock fabrics and simple embroidery. The trade-off is usually a higher per-unit price, but it lets a brand test a design before committing to a larger production run.
Conclusion
A camp cap begins with a rough sketch, but the real work is translating that idea into a first sample without flattening its character. Rather than locking every detail at the start, the pattern maker leaves room for tweaks in brim curve and panel depth. Fabric choice does a lot of the emotional work: a stiff cotton twill reads as structured and sporty, while a brushed canvas or washed nylon moves the hat toward a softer, worn-in feel. Hardware matters just as much—swapping a metal tri-glide for a plastic clip changes how the strap sits and how the cap feels on the back of the head. Once materials are settled, the five panels are cut with attention to grain direction, then joined so the center front seam stays crisp and the crown doesn't pucker. A slight curve in the top panel helps the hat sit naturally instead of looking boxy.
Custom marks are added after the crown is assembled, not before, because embroidery placement shifts once the panels are pulled tight over the form. The factory often positions a woven label near the back seam or a small embroidered hit on the wearer's left side, depending on how the cap is meant to be photographed. Before packing, each hat goes through a final pass: loose threads are trimmed, the brim is checked for symmetry, and the sweatband is felt for lumps. Small runs get the same attention, but the line adjusts by grouping similar colors or moving to a modular sewing setup so a 50-piece order doesn't stall a larger production schedule. That flexibility is what keeps custom five-panel orders both practical and distinct.
Contact Us
Contact Person: Tommy
Email: [email protected]
Tel/WhatsApp: 8613546956008
Website: https://www.4ugearsupply.com/